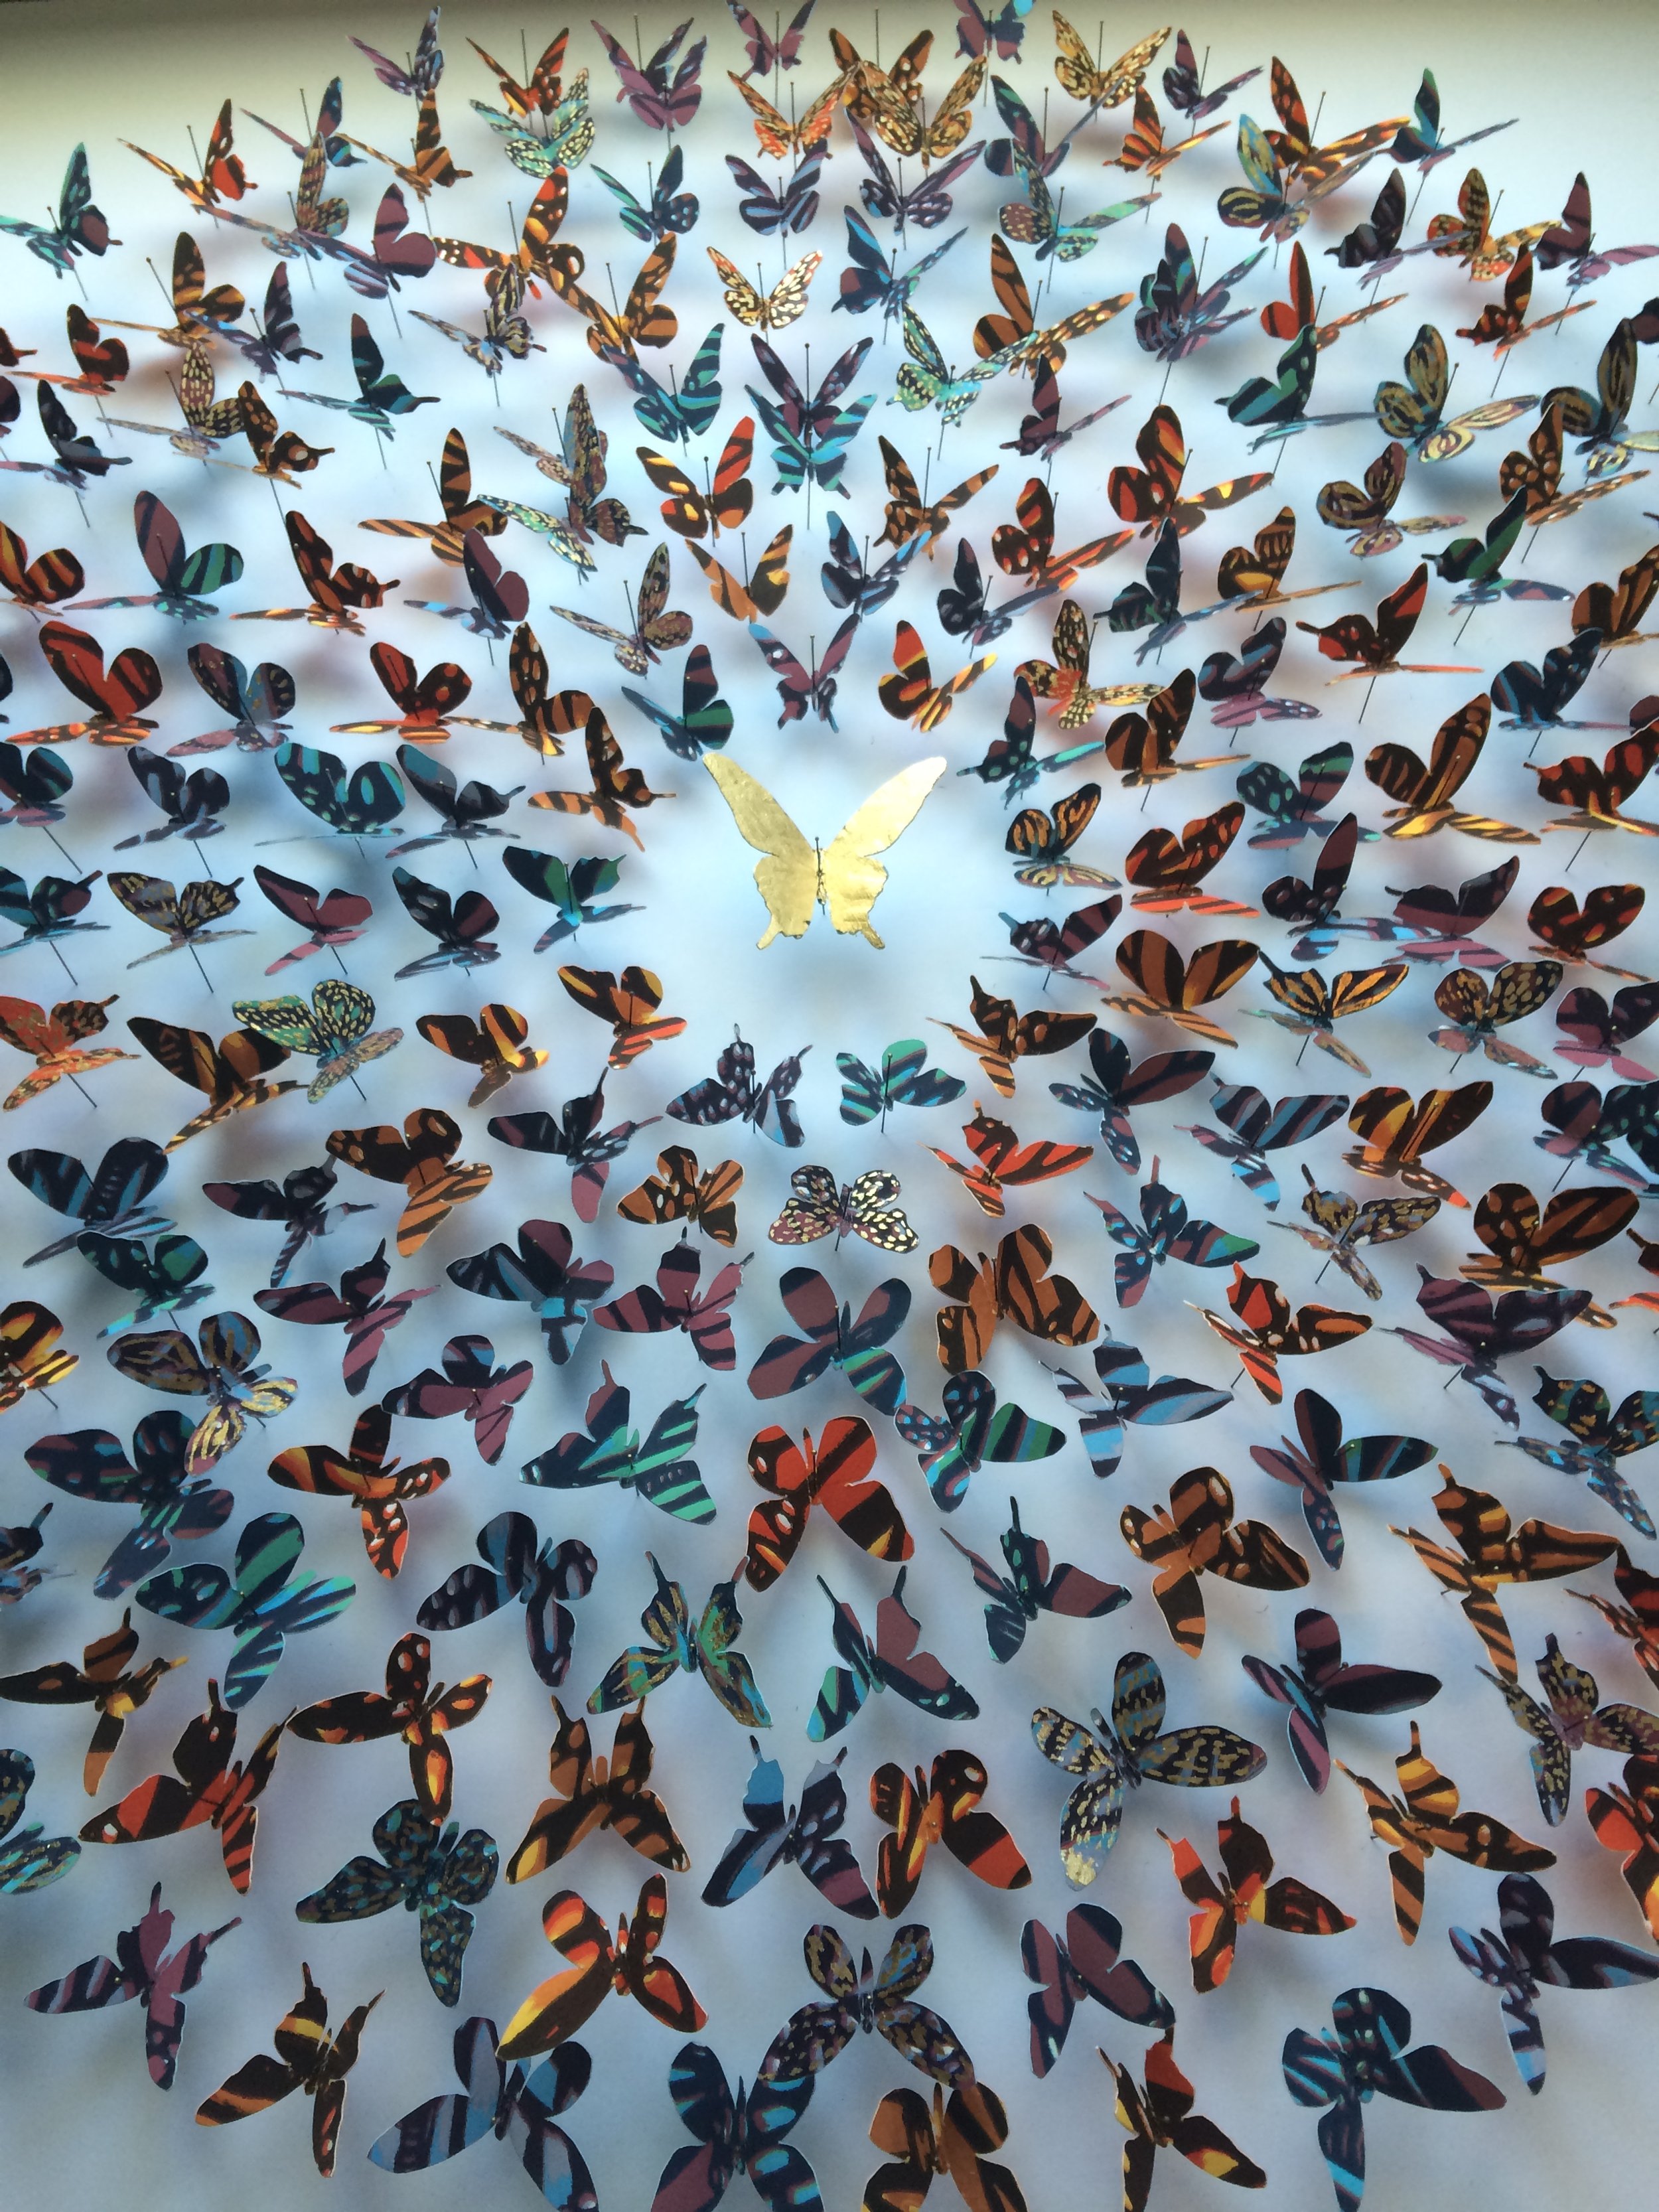
Over one hundred unique paper butterflies are featured in this display. Creating it took many steps - from design, printing the paper, and assembling the butterflies.
Some Background:
I made this piece for my senior project exhibition at the University of New Orleans in 2016. Printmaking was my focus; I chose it for my concentration because I loved the ability to create multiples of my original works of art using methods like relief, linoleum block prints and intaglio, copper plate etchings. And, I loved working in the printmaking studio!
In prior art classes, I used butterflies as a theme in many of my projects. I knew I wanted to continue to use butterflies in a piece that would stand out for my senior project. I started thinking of how I could use a printmaking technique to create a three dimensional display. As I began brainstorming, I thought back to a family trip a few years earlier, and I remembered the butterfly taxidermy displays I saw at the Butterfly and Nature Conservatory in Key West, Florida.
The Inspiration
I was inspired by the extravagant butterfly taxidermy displays that I saw a few years earlier on a trip to the butterfly and nature conservatory in Key West, Florida. I thought it would be amazing create a display like that of paper butterflies, and I could use a printmaking technique to to print my own paper.
The photos featured here are of the butterfly displays at the New Orleans Insectarium. I took a trip there before working on my project to get ideas and study the butterflies. I loved seeing the specimens up close!
the sketch…
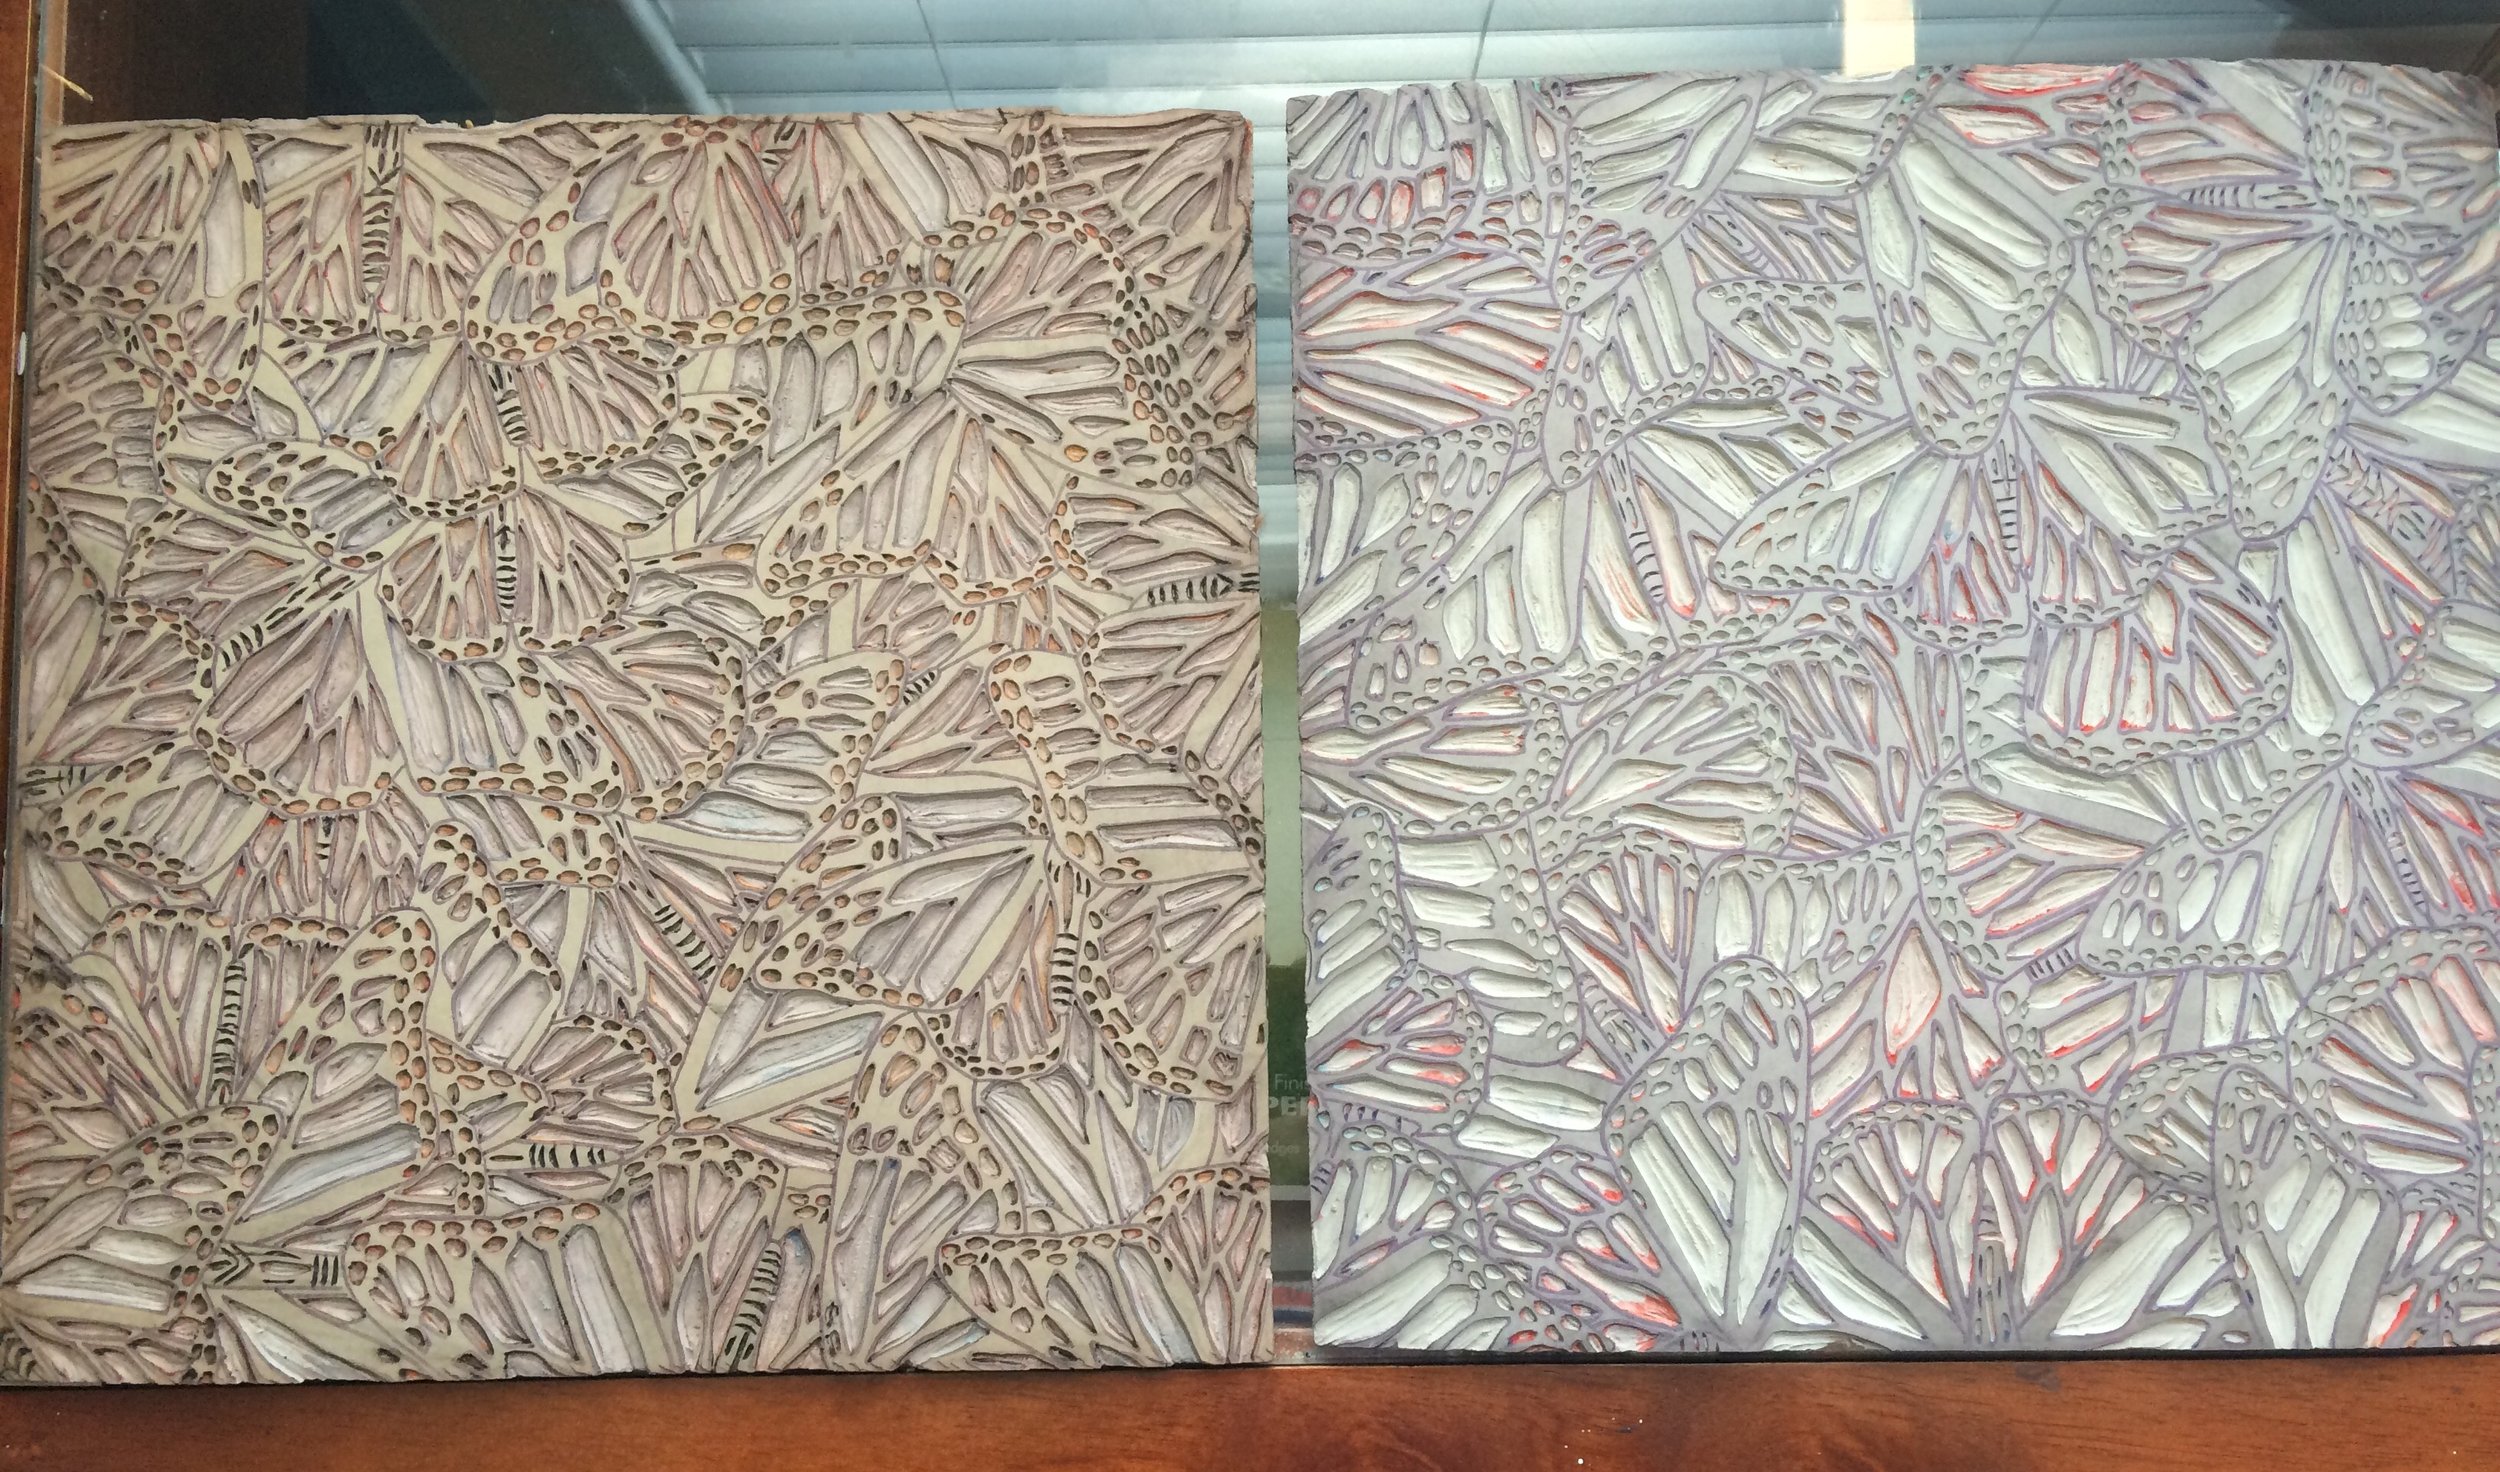
After I planned my idea, I started on the paper design with a sketch. Here’s a photo of my monarch butterfly wing design. The design mimics the wings of monarchs when they cluster together. This is the same concept I use in my monarch migration collections. I did two sketches.
the linoleum blocks…
After sketching the designs, I transferred my sketches on to two linoleum blocks. I used the reduction relief printing technique to print the paper. In this process, one block is used to make a multi layer or multi color print. I used a linoleum piece for my block. I didn’t take many photos of the blocks in their different stages of the carving and printing process. This is a closeup photo of the final carving, also called the key. Notice only the outline of the wings are left.
The printing process
I hand printed each layer of color onto Rives BFK paper. Once one layer/color was printed, I then carved away parts of the block where I wanted that color to remain. Each print consists of four colors for the design. I did many prints in this series, so these blocks were hand inked and run through the printing press hundreds of times! It’s a process that is very laborious and all done by hand.
The photos below show some of the process of reduction relief printing:
First I inked up the block, and then printed the block without carving it, so that left the base color. Then, I carved away the places in the block where I wanted the paper to remain that original color. I repeated these steps of inking, printing, and carving…
I also printed a solid color on the backs of the paper so that the butterflies would have color on their undersides. By printing a solid color on the back of the paper, this would create a warm or cool reflection onto the white backing board of the shadowbox, when light was shown on the display of butterfly silhouettes.
the final relief prints…
Here are photos of my final relief prints in the different color variations. I was really happy with the way these turned out. With reduction printing, you don’t always know if the final product will turn out exactly how you imagined it.
creating silhouettes…
I used the finished relief prints to cut out silhouettes of butterflies. This results in each paper butterfly having a unique pattern on its wings from the relief prints. I adorned some of the cut-outs with gold leaf. The gold leaf allows the light to play across the display.
Some of the butterflies sparkle.
Below you can see more photos of creating the silhouettes.
And, I also kept some of the relief prints uncut. Some are still available in my shop.
layout…
It took a lot of trial and error to see what I liked best. After many attempts, I fell in love with a circular arrangement of butterflies.
Photos of my many layout attempts.
The final display:
The final step was securing each cut-out onto a butterfly entomology pin, which are the same ones used for real butterfly displays.
The piece was then custom framed in a large, white, wooden shadowbox. The frame compliments and brings the artwork together in a grand display.
Below are some photos of the final project :) If you look closely, you can see the light orange and blue hues reflected onto the white backing board.
Hand cut silhouettes of butterflies. Cut from original relief prints, printed on back and front. Adorned with gold leaf. Fastened with entomology pins.
Framed in a white, wooden shadowbox.
Dimensions: 31 ¼" x 31 ¼" (3 ½" deep)
Detail photo of the paper butterflies in After Life, Under Glass
Detail photo of the paper butterflies in After Life, Under Glass
Detail photo of the paper butterflies in After Life, Under Glass
Detail photo of the paper butterflies in After Life, Under Glass
Detail photo of the paper butterflies in After Life, Under Glass
Detail photo of the paper butterflies in After Life, Under Glass


